Working with Resource pools
The administrator role in RenkuLab
To make changes to the configured resource pools and classes, your user needs to
have the renku-admin role.
To do so, first sign in to the Keycloak console and open the Renku realm.
Then, search for your own user and head to the Role mapping tab.

There you can check if renku-admin is listed as a role; if not, you can assign
the role by clicking Assign Role and selecting renku-admin from the list.
Confirm the assignment by clicking Assign; the renku-admin role should now
be listed for your user.
Once this step is done, you must sign out and in again to RenkuLab to refresh your user permissions.
Using the admin panel in RenkuLab
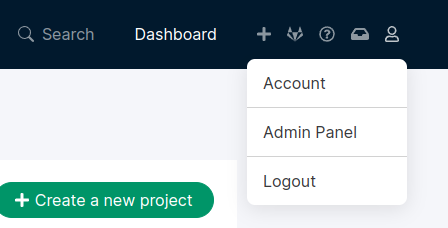
If your user has the renku-admin role, you should now have access to the admin
panel in RenkuLab. The link to the admin panel is located under the account
menu in the top-right navigation bar.

The admin panel lets you configure resource pools and classes to be used in interactive sessions. You can also assign users to private resource pools to give them access to specific compute resources.
Working with the Compute Resource Control service
Administrative actions on resource pools can also be performed through a dedicated REST API which can be interacted with via a Swagger Web UI. This is available at:
<renku.landing.page>/swagger/?urls.primaryName=crc%20service
It is worth noting that the API permits access to some read operations without authentication. As such, it is possible to use this interface to see some aspects of the state of the system without requiring a valid authentication token. Changing the state of the system requires an authentication and the correct authorizations.
Making changes to the resource pools and classes
To make changes to the configured resource pools and classes, it is necessary to use a valid authentication token. There are two steps to this:
first, you need to ensure that your user has the renku-admin role. This can be done by searching for your user in Keycloak and choosing the Role mapping tab; if the renku-admin role is already mapped to your user, there is nothing to do but if not you need to click Assign role and add this role to your user.
when this has been done, you can authorize the Swagger UI; this can be done by clicking on the Authorize icon at the top of the page. This provides a number of different options for authorization (maybe 7) - you need to select the PKCE option and you do not need to enter a client_id or client_secret - simply leave these as defaults and click on Authorize. If you are already logged in, this will go through a pretty seamless authentication flow and you will be authorized on the Swagger UI; if you are not logged in, you will be asked to log in to Renku and ultimately redirected back to the Swagger UI.
When you have successfully authenticated, you can send POST requests to the endpoint. The API definition provides examples of what kind of entities should be sent to the endpoint to create resources.
Note that the token has an expiry which means that at some point you may need to re-authenticate. If you see systematic errors in your responses, this is likely the case.