Add data to your project
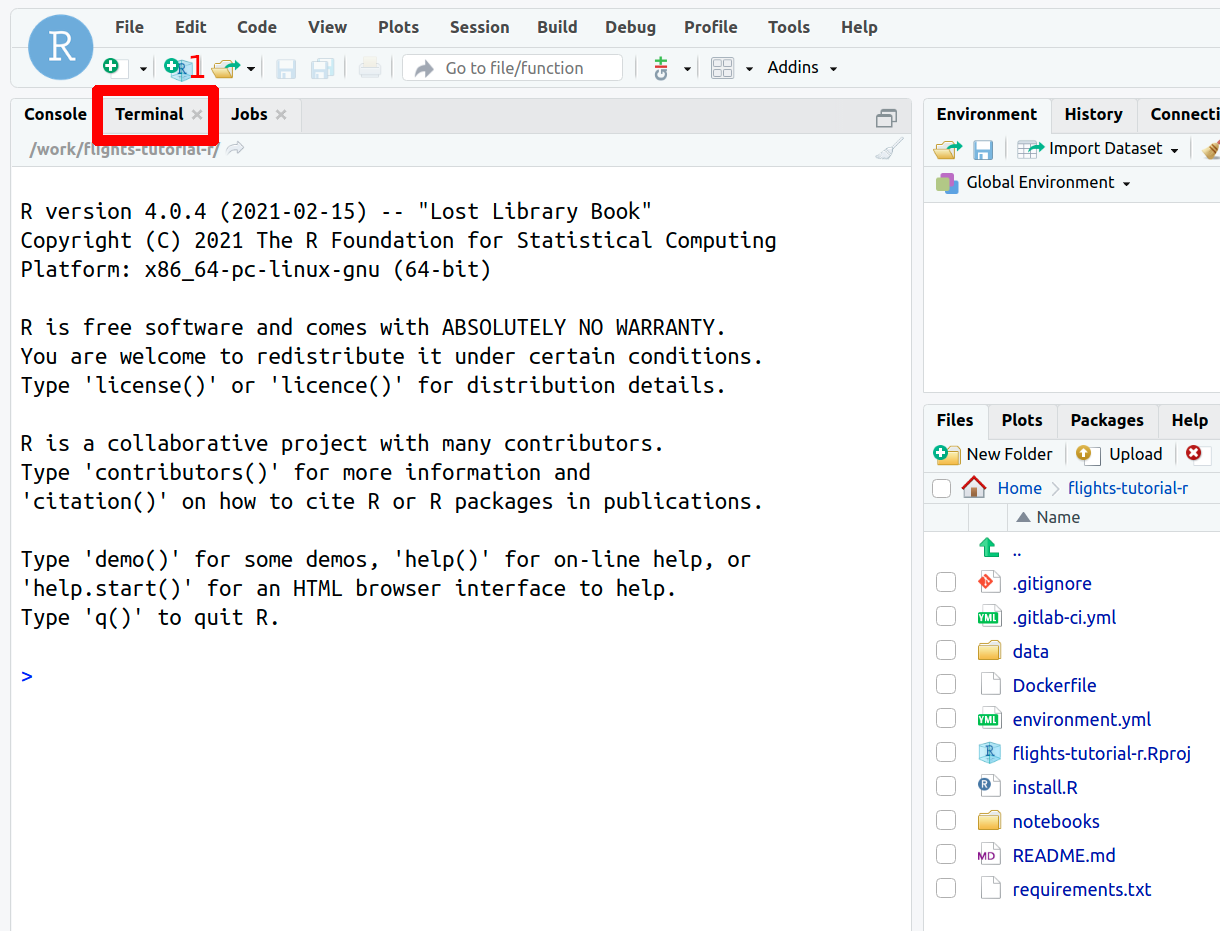
In the JupyterLab interface or RStudio files panel, we can see that a few files already exist. Let’s start by adding data using the Renku CLI.
For JupyterLab, start a terminal by clicking the Terminal icon (1) on the bottom right of the Launcher page.
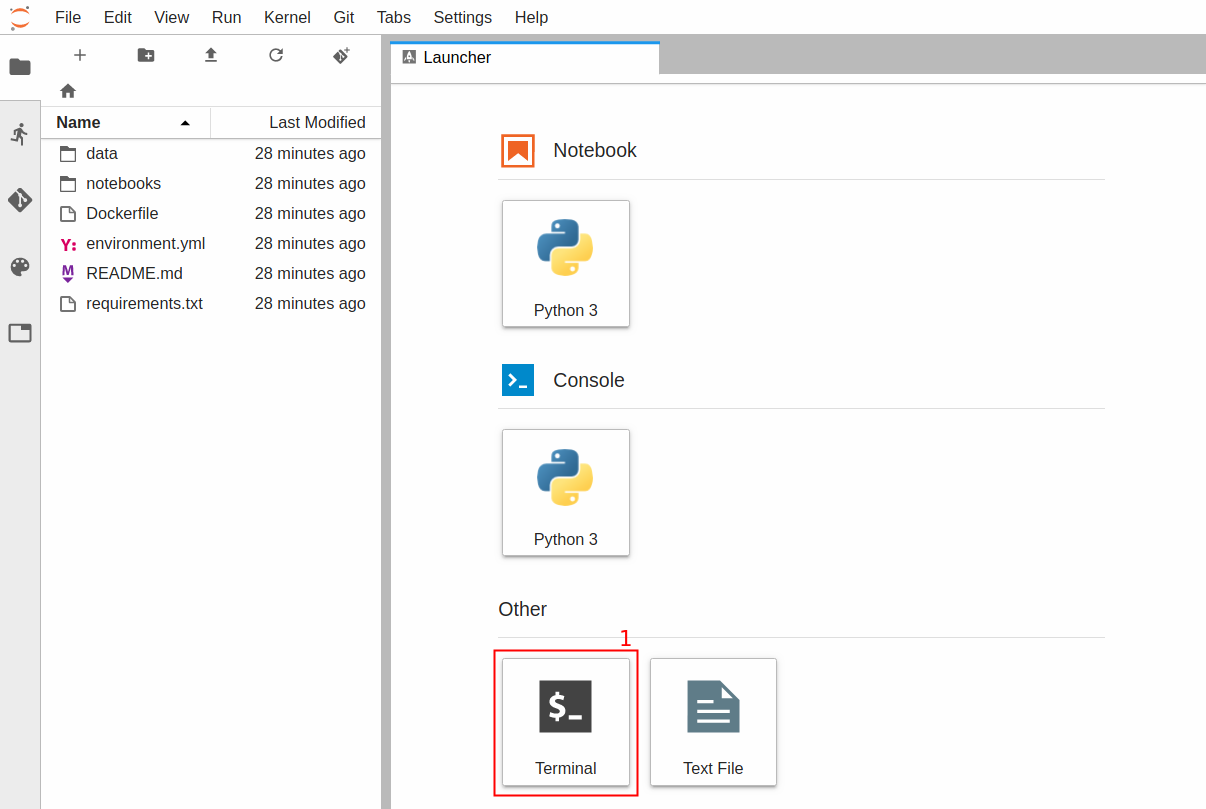
If your JupyterLab interface does not have the launcher tab open, you can find it in the top bar menu in File > New Launcher.
Note
To paste commands to the JupyterLab console, use Cmd+V on MacOS or
Ctrl+Shift+V on Linux.
When you start the terminal, you will already be inside your project directory, so you are ready to create a dataset.
Renku can create datasets containing data from a variety of sources. It supports adding data from the local file system or a URL. Renku can also import data from a data repository like the Dataverse or Zenodo.
Adding data from a remote repository
The advantage of importing data from a data repository is that it can contain metadata that can be used to help interpret it. Another advantage is that data repositories assign DOIs to data which can be used to succinctly identify it and guarantee that the data will be findable and accessible for a longer period of time (usually at least 20 years).
The DOI for the dataset we want to import is https://www.doi.org/10.7910/DVN/WTZS4K
Execute the following line and when prompted if you really want to download the data, answer yes.
$ renku dataset import --name flight-data https://www.doi.org/10.7910/DVN/WTZS4K

Output:
CHECKSUM    NAME                       SIZE (MB)  TYPE
----------  -----------------------  -----------  ---------------
            2019-01-flights.csv.zip         7.56  application/zip
Warning: Do you wish to download this version? [y/N]: y
Info: Adding these files to Git LFS:
        data/flight-data/2019-01-flights.csv.zip
To disable this message in the future, run:
        renku config set show_lfs_message False
OK
Let us take a moment to understand what happened there. Opening the terminal
puts you inside the project directory with git already configured.
Then we imported a dataset using the Renku Command Line. Here, we can see the method of referencing a dataset in a data repository by DOI. By doing so, we capture a reference to the source of the data in the metadata of the project.
You can list the datasets in a project by running the following:
$ renku dataset ls

ID                                    NAME         TITLE               VERSION
------------------------------------  -----------  ------------------  ---------
29f121ea-cf16-4512-932f-7b195480cb9b  flight-data  2019-01 US Flights  1.0
The file we added contains data on flight take-offs and landings at US airports, and it comes originally from here. As the file name suggests, this file covers data for January, 2019.
We can see that the two renku commands make use of the underlying git
repository:
$ git log

Output similar to:
commit 3809ce796933bd554ec65df0737b6ecf00b069e1
Author: John Doe <john.doe@example.com>
Date:   Mon Apr 29 11:58:33 2022 +0000

    renku dataset import --name flight-data https://www.doi.org/10.7910/DVN/WTZS4K

    renku-transaction: 2ff1f09bd9424270ac27f80f759b5388

commit 3f74a2dfdf5e27c1dc124f6455931089023253b8 (origin/master, origin/HEAD)
Author: John Doe <john.doe@example.com>
Date:   Mon Apr 29 11:53:41 2019 +0000

    dev.renku.ch: init Flights tutorial

    renku-transaction: 2fa7df0457764d2aa1612ce719edaff8
$ git status

Output similar to:
On branch master
Your branch is ahead of 'origin/master' by 1 commit.
  (use "git push" to publish your local commits)

nothing to commit, working directory clean
Let us push the two fresh commits by running:
$ git push

Output similar to:
Locking support detected on remote "origin". Consider enabling it with: [...]
Uploading LFS objects: 100% (1/1), 7.9 MB | 0 B/s, done
Counting objects: 15, done.
Delta compression using up to 8 threads.
Compressing objects: 100% (12/12), done.
Writing objects: 100% (15/15), 2.26 KiB | 463.00 KiB/s, done.
Total 15 (delta 2), reused 0 (delta 0)
To https://renkulab.io/gitlab/john.doe/flights-tutorial.git
    b55aea9..91b226b  master --> master
Adding data from the local file system
Often the data you wish to use on Renku is not available on a remote repository.
In this case you can either create a dataset using the RenkuLab UI or use the data upload user interface in JupyterLab
or RStudio. Within a running session, the latter is the easier option. For this example, suppose that we have downloaded the
2019-01-flights.csv.zip file to our local computer and wish to upload this
to our Renku project and add it as a dataset. We start with working in the
terminal to set up the Renku dataset.
First let us create a Renku dataset called flight-data with the title
‘2019-01 US Flights’.
$ renku dataset create flight-data --title "2019-01 US Flights"
Creating a dataset ... OK
Then create a folder called flight-data in the data folder.
$ mkdir data/flight-data
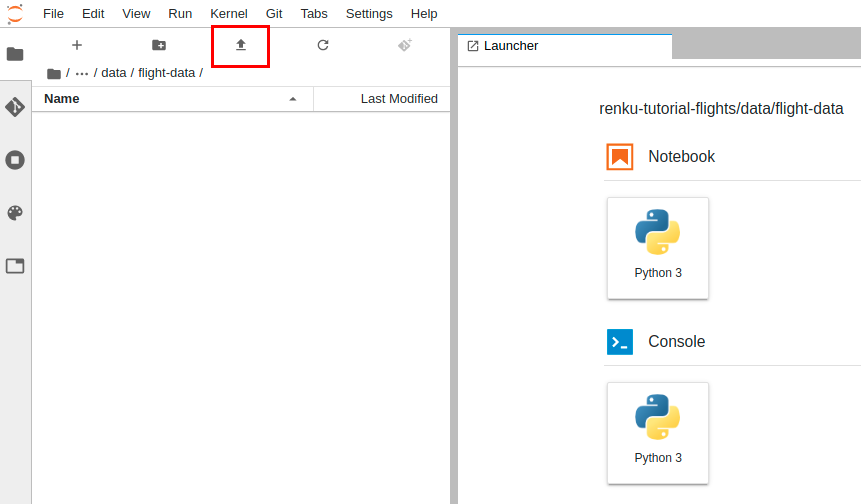
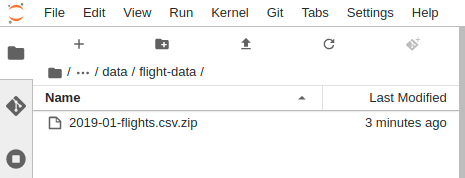
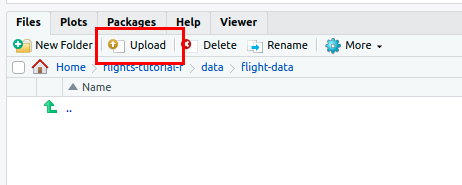
Navigate to the flight-data folder and click on the upload button as shown
in the two examples below. Select the zip folder corresponding to our dataset and upload it.
For the rest of this tutorial, we continue with the assumption that
you have uploaded the data using the dataset import from the remote
repository as indicated in the previous section. That is, the csv file
will still be zipped in the proceeding sections.
After we upload the file, we need to add the file to the Renku dataset. Navigate
back to the working directory and add the file to the flight-data Renku
dataset.
$ renku dataset add flight-data data/flight-data/2019-01-flights.csv.zip
Warning: Adding data from local Git repository: Use remote's Git URL instead to enable lineage information and updates.
Info: Adding these files to Git LFS:
        data/flight-data/2019-01-flights.csv.zip
To disable this message in the future, run:
        renku config set show_lfs_message False
OK
Check that the right file has been associated with the flight-data Renku
dataset by running
$ renku dataset ls-files
DATASET NAME    ADDED                  SIZE  PATH                                      LFS
--------------  -------------------  ------  ----------------------------------------  -----
flight-data     2021-05-31 09:47:41   46 MB  data/flight-data/2019-01-flights.csv.zip  *
