Connect to RenkuLab Sessions with SSH & Local IDE
Would you prefer to work in a RenkuLab session from your local environment? Do you prefer to edit code in your own IDE, rather than in a browser?
You can easily connect to the remote session environment directly using SSH and work on it from your local machine. You can even open the session with your favorite tools, such as VSCode.
Check if SSH is enabled in your project
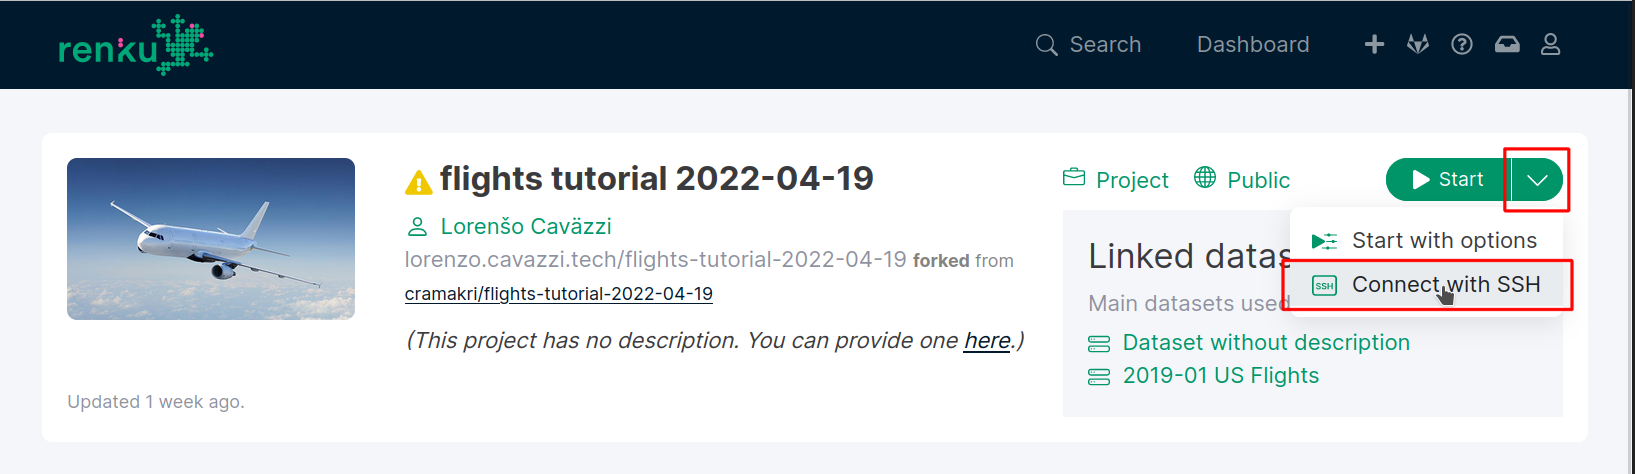
You can check if your project supports SSH by clicking the drop down next to the Session Start button and seeing if the “Connect with SSH” option is available, and the dialog says your project supports SSH.
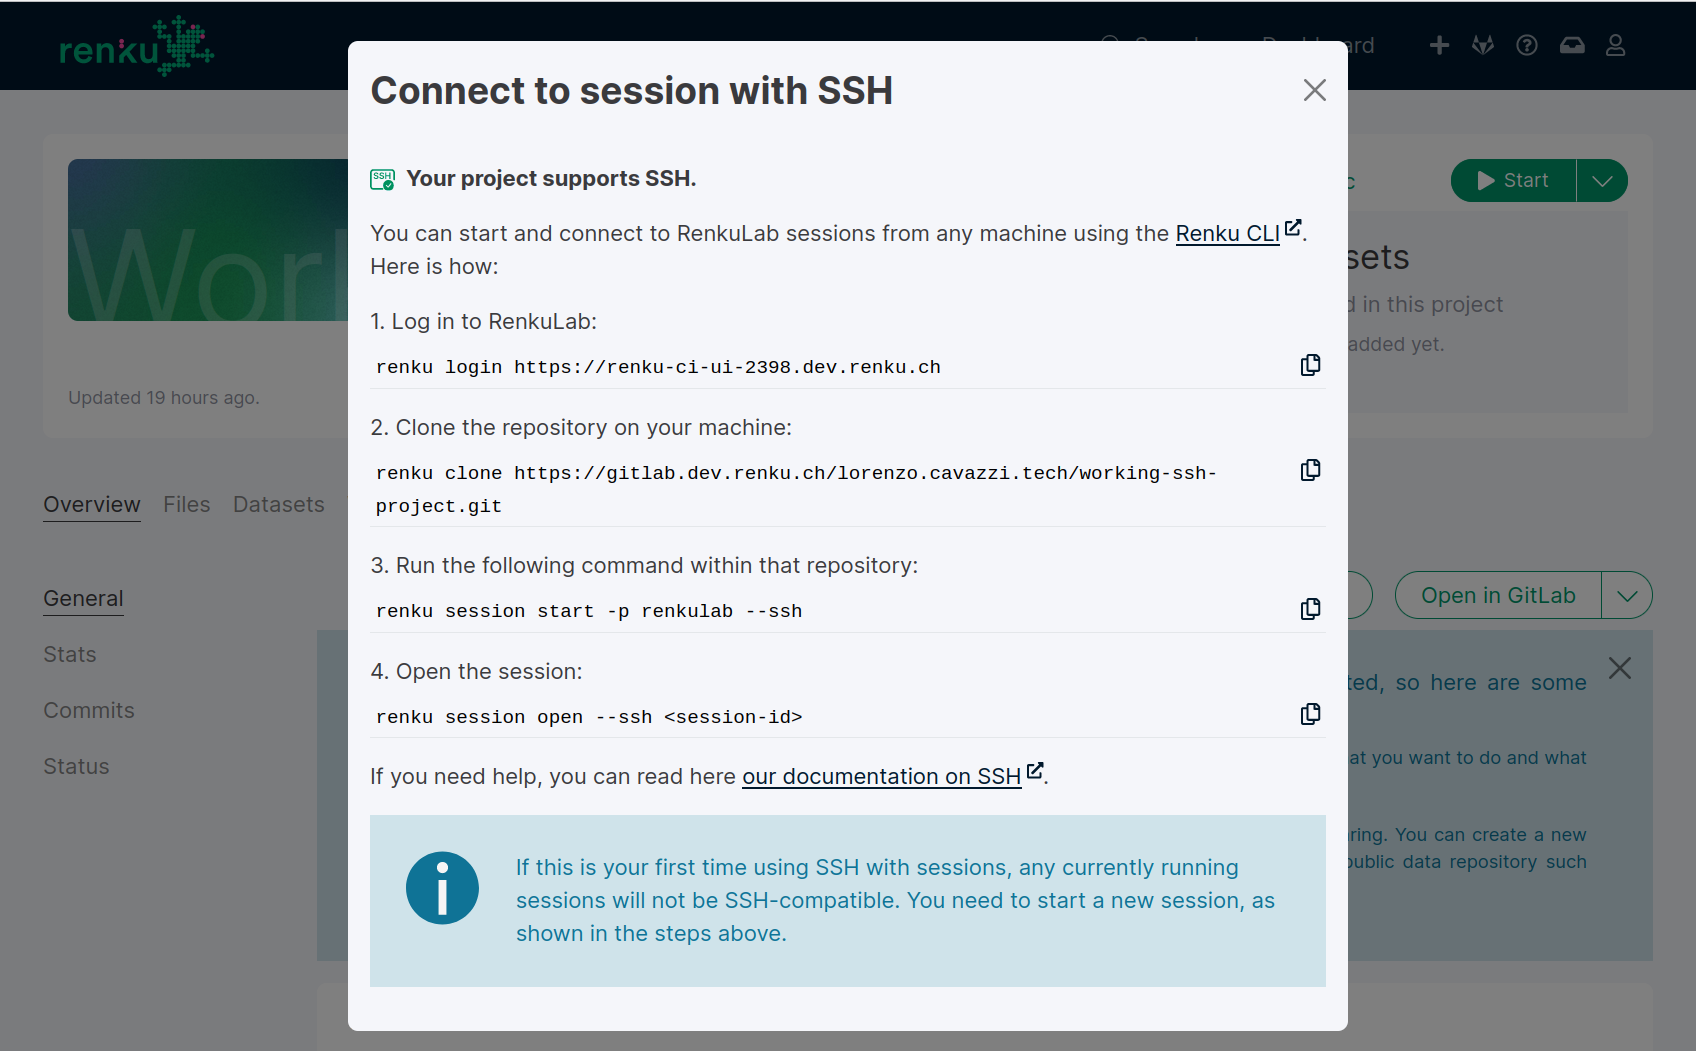
If you see “Your project supports SSH” as in the screenshot below, your project is SSH-enabled, and you can skip down to the next section!
Note
Don’t see an SSH option in the Session Start menu? If you are working on a custom instance of RenkuLab (not renkulab.io), this may be because SSH needs to be enabled by your administrator. Contact your RenkuLab administrator to see if SSH can be enabled.
Enabling SSH for your project
If the SSH dialog says that SSH is not enabled for this project, this likely means that your project is using an old project template.
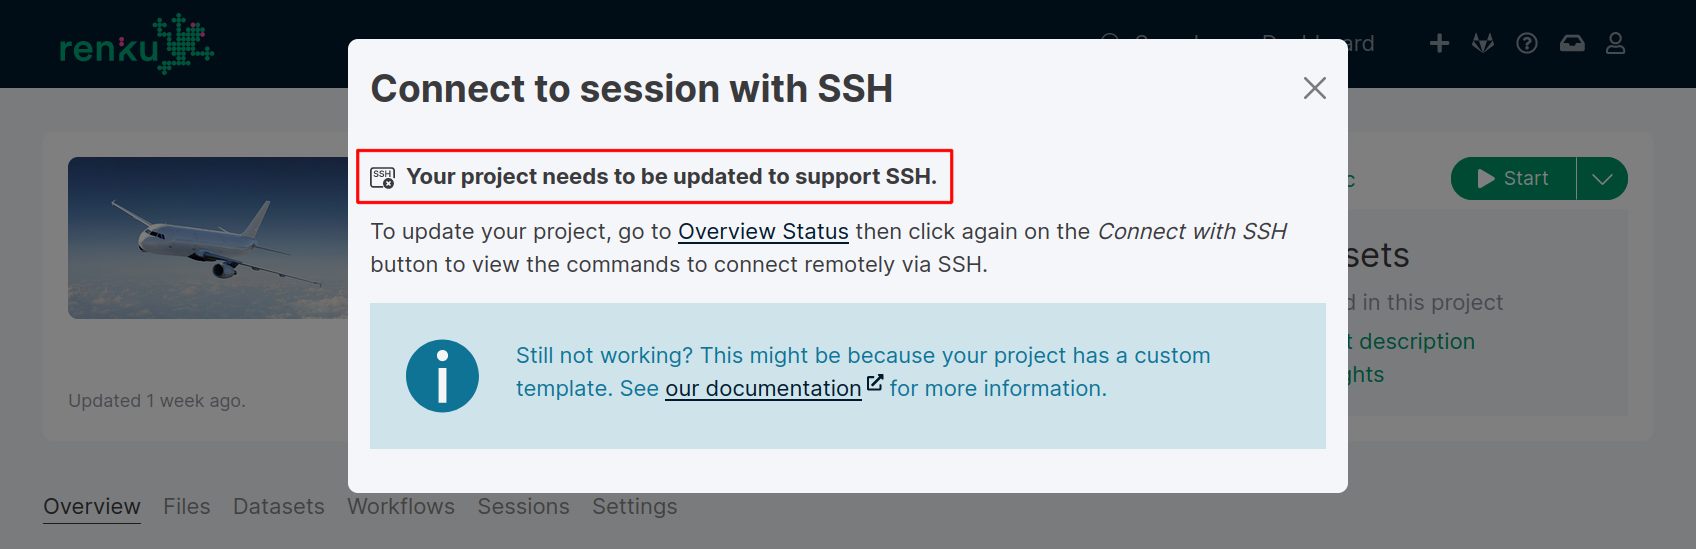
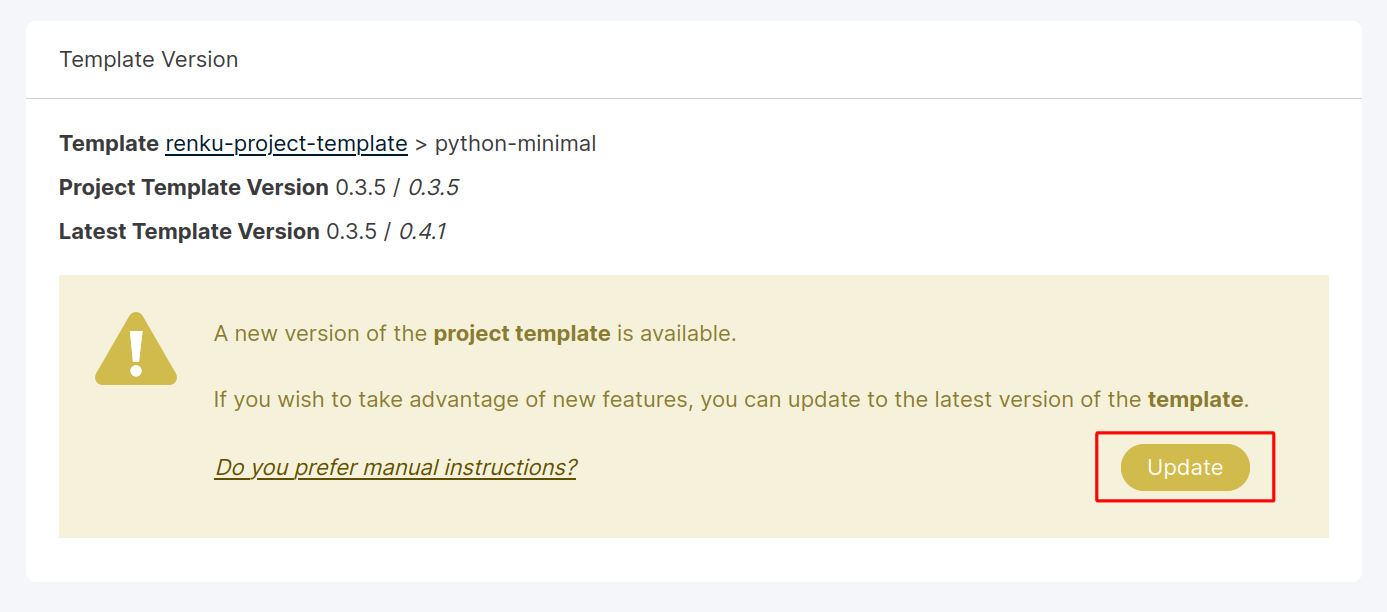
To update your project template, click on “Overview Status” to open the project status page. Find the “Template Version” section, and click “Update”.
Alternatively, you can manually enable SSH for your project by upgrading your
base image to at least version 0.14.0. Then, run
renku config set ssh_supported true to let Renku know that your project supports
SSH connections.
Note
Are you using a custom project template? If you’ve updated your project template but your project still doesn’t support SSH, ask the template maintainer to enable SSH in the template and perform the update again.
Note
Note for template maintainers: See the documentation on the Template
manifest.yaml for details on how to enable SSH support in your
template, specifically the details on the ssh_supported flag.
Set up your local system for SSH access
Connecting to RenkuLab sessions via SSH requires 3 prerequisites to be setup on your local machine (where you want to SSH from):
OpenSSH
>= 7.6is installedthe Renku CLI
>= 2.3.0is installedyour Renku project is cloned
This section will guide you through setting up these prerequisites.
To check whether
sshis installed, runssh -V. If you get a response like OpenSSH_8.6p1, LibreSSL 3.3.6, and the version number for OpenSSH is>= 7.6, then you are good to go!Install the Renku CLI version
>= 2.3.0.If you do not already have the CLI installed, see Install the Renku Command-line Interface.
To check the version of your Renku CLI, run
renku --version. If the version is less than2.3.0, runpip install --upgrade renku>=2.3.0.Clone your Renku Project. You can find the
renku clonecommand under your project’s Settings tab. Or, form it yourself in the style of the following URL:$ renku login renkulab.io # this step is required if your project is private or internal $ renku clone https://renkulab.io/gitlab/user/my-project.git
Note
Do you want to use password-protected ssh keys for your RenkuLab
sessions? By default, the first time you launch an SSH session, Renku will
create a password-less key pair for use in authenticating with RenkuLab
sessions. If you would prefer to have a password, you can do so by running
(before launching a session) renku session ssh-setup -k
<path_to_keypair> and providing a path to a password protected private key
of your choice. If you’ve already launched a session and would like to
switch to a different key pair, also include the --force option.
Launch an SSH-enabled Session
Navigate so your current working directory is the project you want to start a session in:
$ cd my-project
Log in to RenkuLab with
renku login:$ renku login renkulab.io
Pull any changes. This makes sure that the session you start is for the latest version of your project.
$ git pull
Start a session with
renku session start, using the--sshflag and-p renkulabto specify running the session remotely on RenkuLab:$ renku session start --ssh -p renkulab Your system is not set up for SSH connections to Renku. Would you like to set it up? [y/N]: y [...] Session user-myproject-02a9e407 successfully started, use 'renku session open --ssh user-myproject-02a9e407' or 'ssh user-myproject-02a9e407' to connect to it
Note
Curious what’s happening under the hood? This command starts a new session on RenkuLab. But first, it adds your local SSH keys to the
allowed_keysin the project and pushes those changes to RenkuLab. If this is your first time using the SSH feature on RenkuLab, Renku creates an SSH key pair for you. Once the session is started, Renku creates an SSH connection entry in your local SSH config for that session id. This SSH config entry can be used with your SSH client or tools like VSCode.
Open an SSH Session via a Shell
You can use renku session open to open an SSH
connection directly. This will open a terminal in your RenkuLab Project session
environment.
$ renku session open --ssh <session-id>
venv ▶ ~ ▶ $
If prompted to accept host keys, confirm with yes.
To exit the SSH shell, simply type exit.
Note
How do I find my Session ID? The id of the session is printed when
the session is started by renku session start. In the example above, the session id is
user-myproject-02a9e407, so the command to open the SSH session is:
renku session open --ssh user-myproject-02a9e407.
If you need to find your Session ID again, use
renku session ls.
Note
Can I use the normal ssh command? Yes! If you prefer, you can
use the ssh command directly rather than the renku session open
command. You can again use the session id, for example ssh
user-myproject-02a9e407.
Open an SSH Session in VSCode
After starting an SSH session, follow these steps to open your session in VSCode:
Install the Remote - SSH Extension in VSCode if you don’t have it already.
In VSCode, open the “Remote Explorer” in the left bar and make sure “SSH Targets” is selected. Find the SSH connection for the session, e.g.
user-myproject-02a9e407, and click the “Connect to Host” button.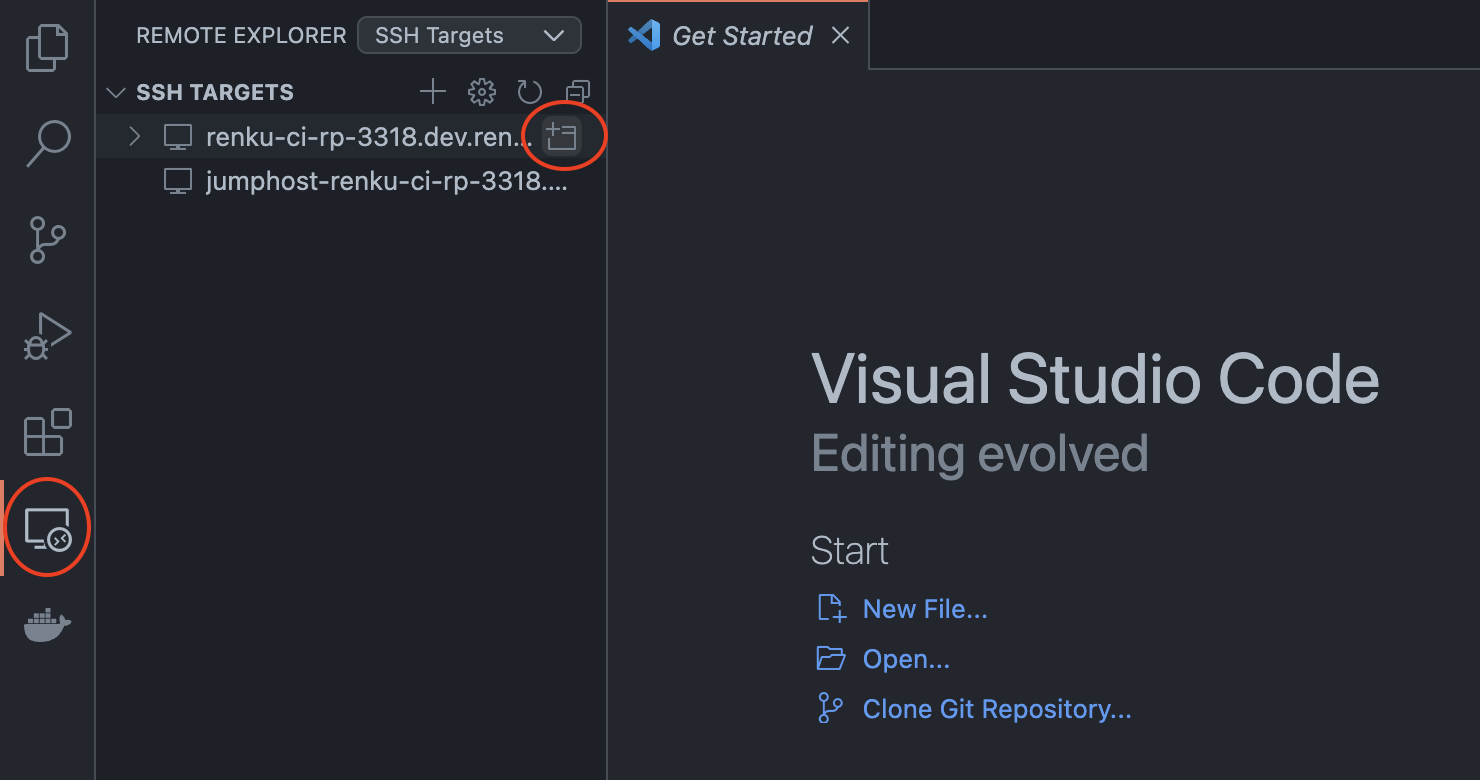
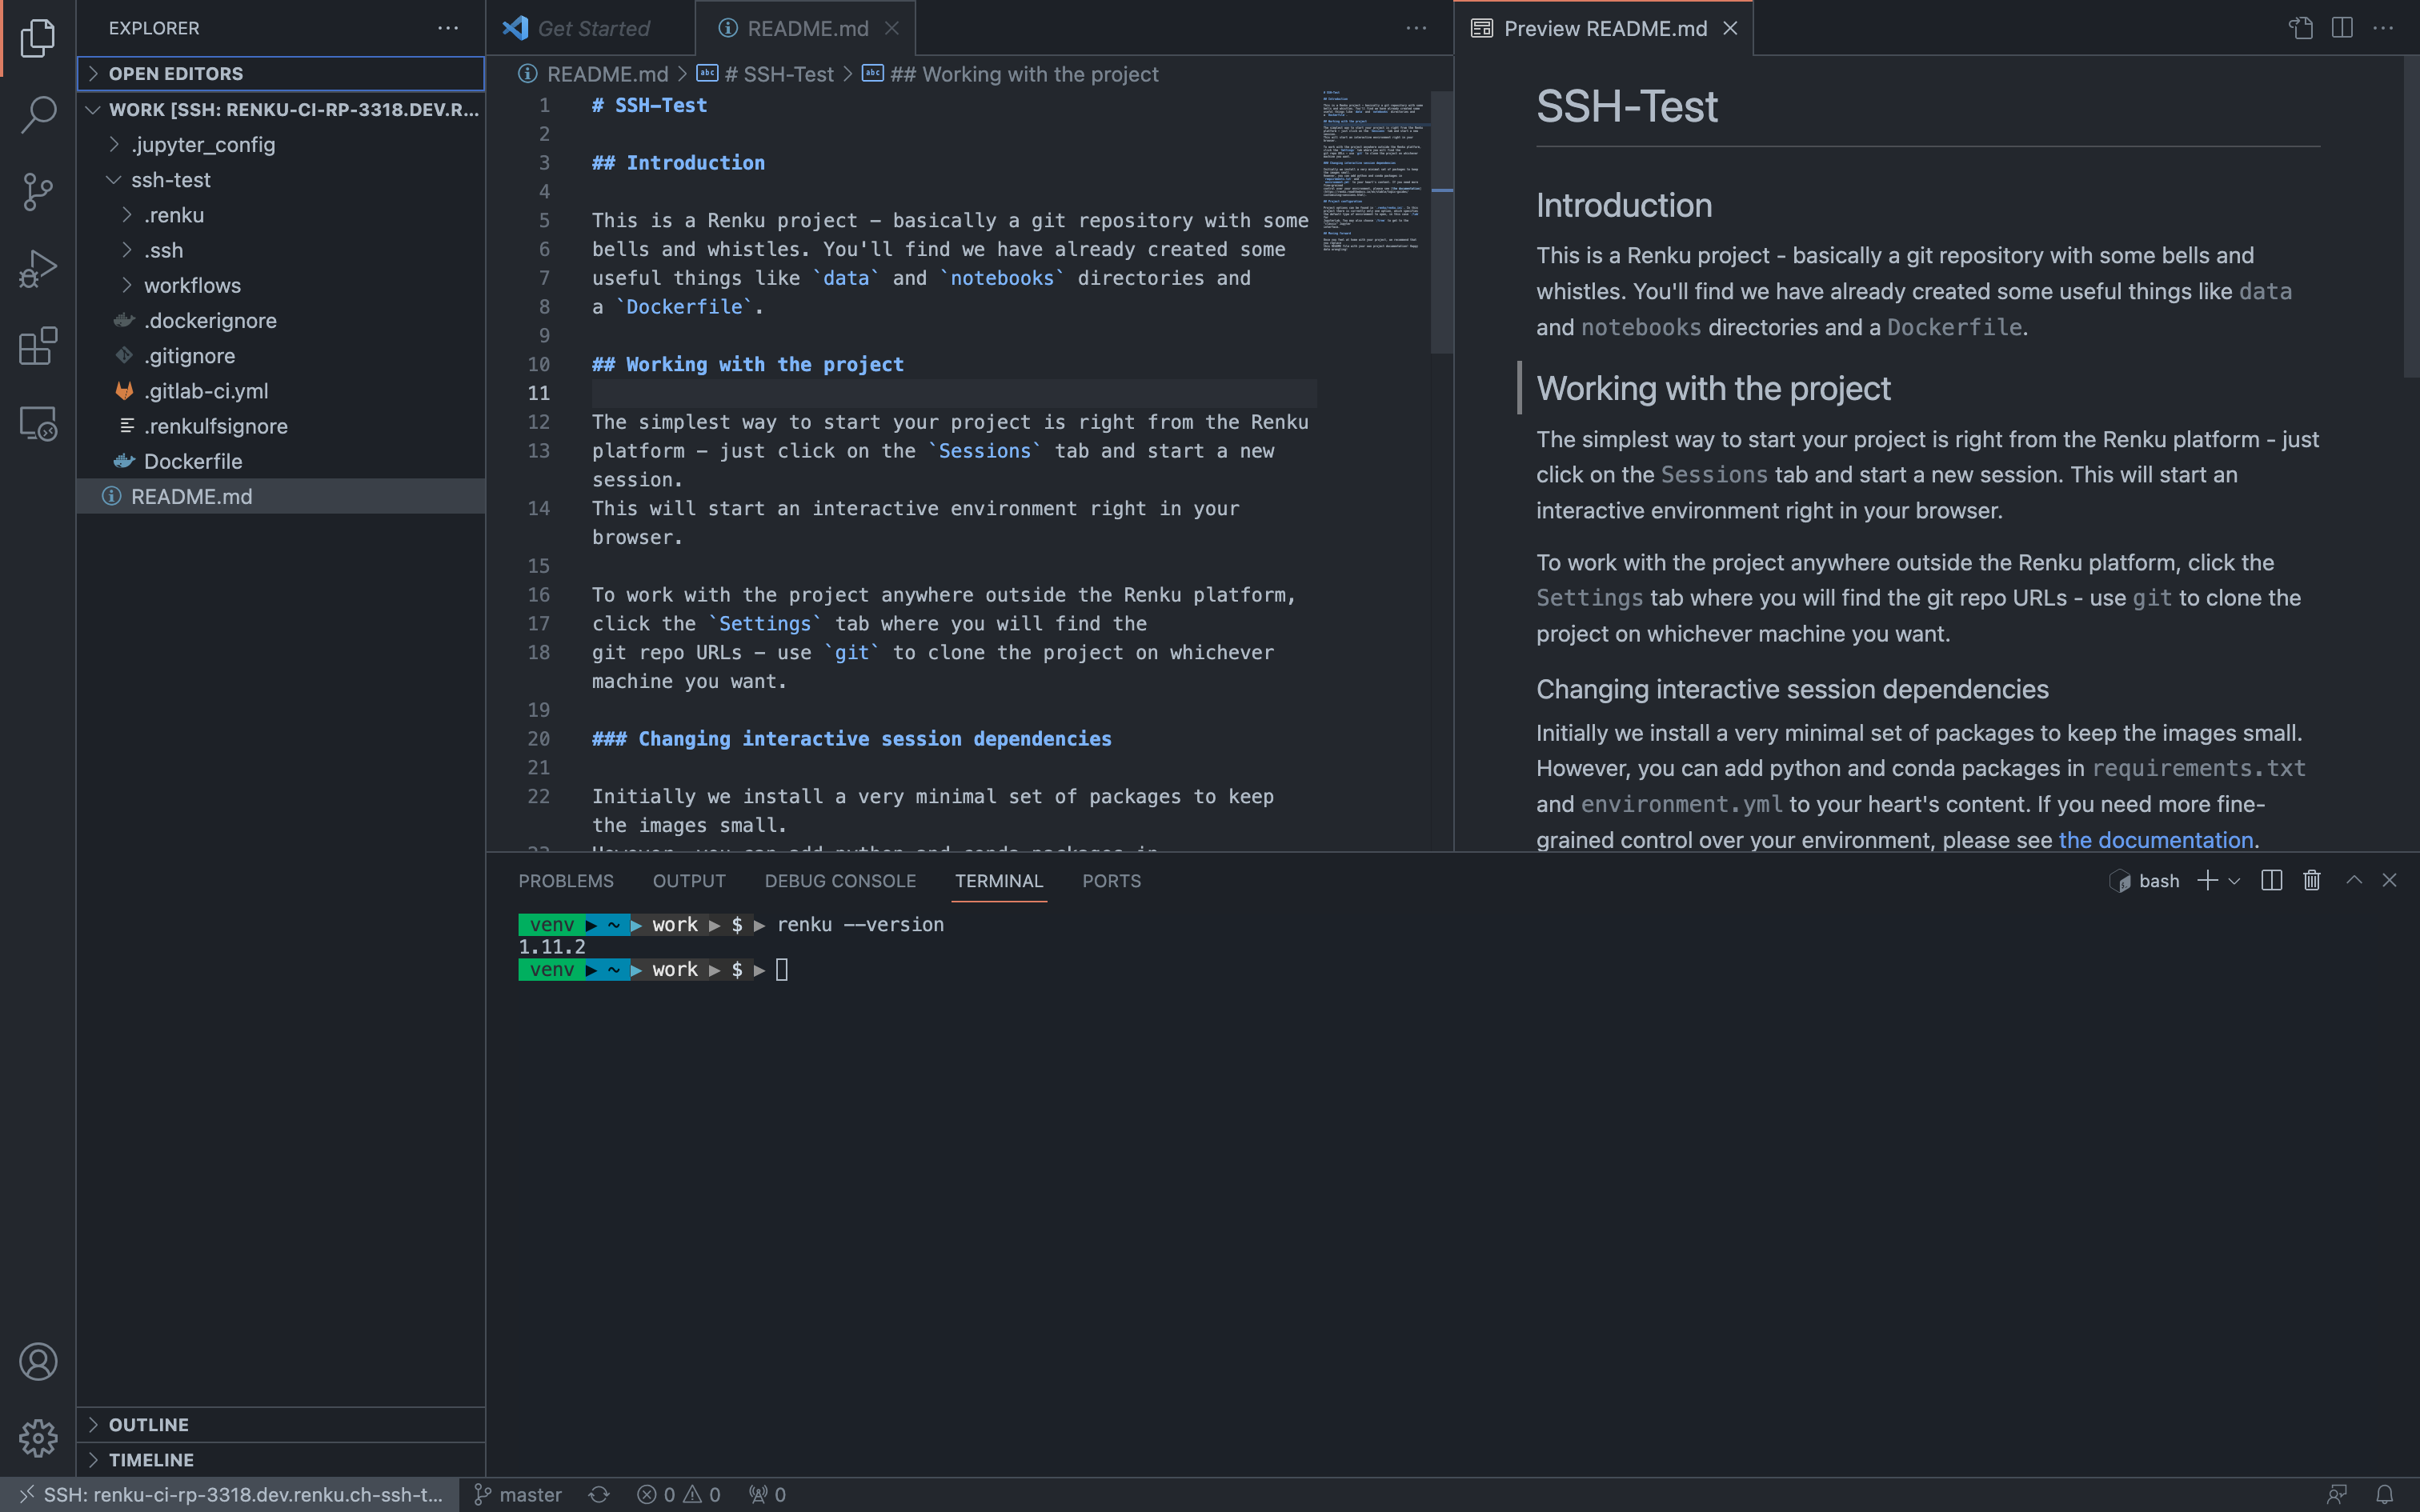
Open the “Explorer” in the left bar, and select “Open Folder”. Enter
/home/jovyan/work.
You can now browse and edit your Renku Project files in VSCode, and run commands in the RenkuLab session via the VSCode terminal!
For more details on the VSCode SSH extension see the official VSCode documentation.
Set up VSCode Extensions on a Remote SSH Host
When connecting to a remote SSH host in VSCode, some of its extensions might not work out of the box. For example, the Python development assistant or spell checker won’t work. This is because the extensions are installed on your local machine, but not on the remote host. You need to install them on the remote host every time you connect to a session.
To install extensions that are already installed in your VS Code on the remote
host, click on the “Extensions” icon in the Primary Sidebar (or press
Ctrl+Shift+X or Cmd+Shift+X). In the “Extensions” panel, you can see
the list of all the extensions installed on your local machine or on the SSH
host in two separate lists. When expanding the local section, you can see
extensions that aren’t in the remote host are grayed out. Note that there are
some local-only extensions that cannot be installed remotely.
To install an extension on the remote host, expand click on the “Install in SSH: <host-name>” button next to the extension name. This will open a new window where you need to click on the “Install in SSH: <host-name>” button to finish the installation.
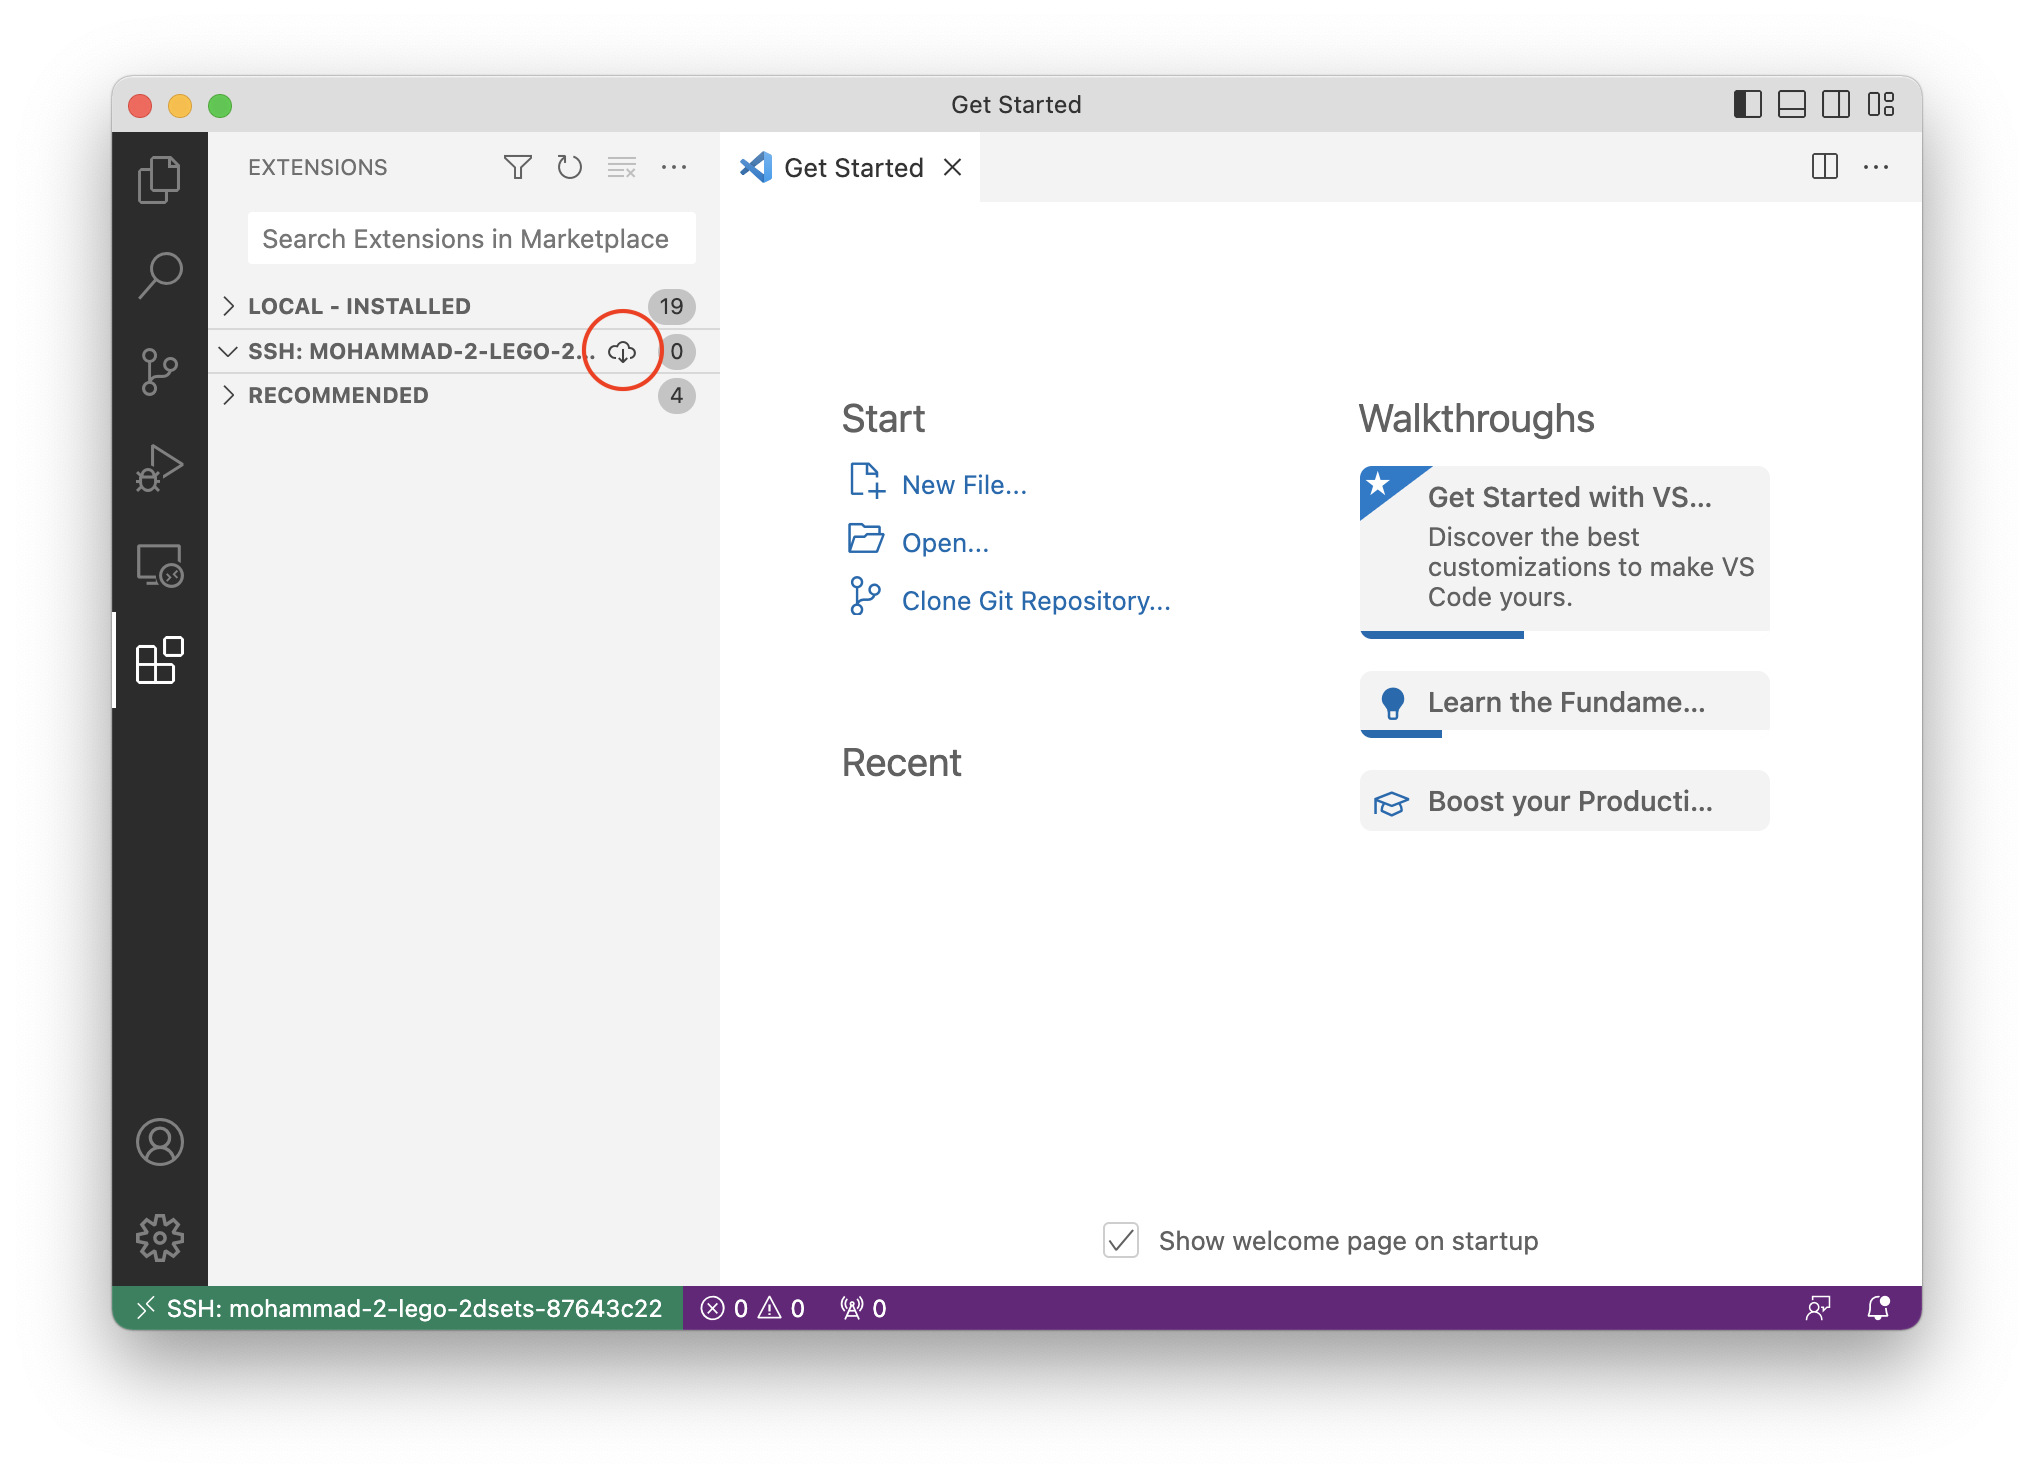
You can also install all extensions at once by clicking on the “Install Local Extensions in SSH <host-name>” button (with a cloud icon) at the right of the “SSH: <host-name>” title bar in the “Extensions” panel. This will show a list of all available local extensions to select which one to install.
“Always installed” extensions
You need to re-install all extensions every time you connect to a session since user setting changes are not persisted. To avoid doing that, you have the possibility to select a list of extensions that will be installed automatically every time you connect to a session.
To do so, open the VS Code settings and search for the “Remote.SSH: Default Extensions” setting (or go to “Extensions” > “Remote - SSH” > “Default Extensions”). This is a list of extension IDs that will be installed automatically on each SSH host. Click on the “Add Item” button on the bottom of it and enter the extension ID you want to add to the list. You can find the extension ID in the “Extensions” panel, in “Local - Installed” title bar by right-clicking on an extension and selecting “Copy Extension ID” in the context menu. Note that you need to only install extensions that are grayed out.

FAQ
My shell environment in an SSH session isn’t the same as when I’m in a session on RenkuLab - What’s going on?
If you’ve made changes to your session environment via your Dockerfile, you may need to change how these changes take effect in order to be consistent between SSH and Jupyter terminals.
Since SSH opens a new terminal when connecting, any customization done in the
Dockerfile, such as adding to the $PATH environment variable, won’t be picked
up, as those changes only apply to the Jupyter terminal.
To make the Jupyter and SSH terminal consistent, your Dockerfile should apply
such changes to /home/jovyan/.bash_profile (or similar, depending on your
image), where they get picked up when any new shell is opened.
For example, if you would like to modify your $PATH, instead of encoding in
your Dockerfile RUN export $PATH=..., use RUN echo 'export $PATH=...' >>
~/.bash_profile instead.