Renku Workflows and Provenance
One of the most important ideas behind Renku is the concept of capturing the
provenance of the analysis process. Lets assume we are working with input
data, code, and results:
If you write a piece of code that takes some input data, processes it and writes some output to disk, the provenance graph would look something like this:
Naturally, a result may also be used as input data to a subsequent step:
In Renku, we provide tools for building such workflows to record and show how data and code are connected. By encoding these relationships, your project is easier for you to manage and faster for others to read and reuse! No more reading through multiple files to understand how they are connected - workflows make the connections between code and data files easy to understand by listing each workflow step and its inputs and outputs.
Each time you track an execution with Renku, you create a workflow step. Encoding a workflow step makes it easier for you to rerun it without retyping long commands. Recording workflow steps in Renku also records metadata that you and others can use to understand how an output was generated.
To take full advantage of workflows, join individual steps together into multi-step workflows. When your code pipeline is encoded as a workflow, you can easily re-run all or portions of your workflow with simple commands, test your code with different parameters and compare the results, or send it to different execution backends.
Working with Workflows
To track your code execution as a Renku workflow, simply prepend renku
run in front of your command. You may also identify the
workflow step’s inputs and outputs via the -i and -o flags, as shown
here:
$ renku run --name run-analysis -- python run_analysis.py -i input_file.csv -o output_file.csv
This command creates a workflow step called run-analysis. You can inspect the
workflow with renku workflow show:
$ renku workflow show run-analysis
Id: /plans/76d73efb94964e9aac3635176ea57a36
Name: run-analysis
Creators: John Doe <example@renku.ch>
Command: python run_analysis.py -i input_file.csv -o output_file.csv
Success Codes:
Inputs:
        - input-1:
                Default Value: run_analysis.py
                Position: 1
        - i-2:
                Default Value: input_file.csv
                Position: 2
                Prefix: -i
Outputs:
        - o-3:
                Default Value: output_file.csv
                Position: 3
                Prefix: -o
Once the workflow is recorded, you can execute it again renku workflow execute:
$ renku workflow execute run-analysis
Similarly, you can re-execute the workflow with modified parameters, for example:
$ renku workflow execute run-analysis --set i-2=other_input_file.csv
which would run it on the file other_input_file.csv instead of the original
input_file.csv file. You could also specify an execution backend with
--provider, e.g. toil for execution in an HPC cluster (You need to
install renku with the toil extra for this to be available).
Composing workflows
To create a workflow my-workflow out of multiple steps use renku workflow compose:
$ renku workflow compose --link-all my-workflow run-analysis process-output
If you had two steps named run-analysis and process-output. --link-all
tells Renku to automatically infer dependencies between steps for you. The newly
created my-workflow can also be executed with renku workflow execute.
Inspecting Workflows
You can see workflows on RenkuLab by going to a project and opening the Workflows tab:
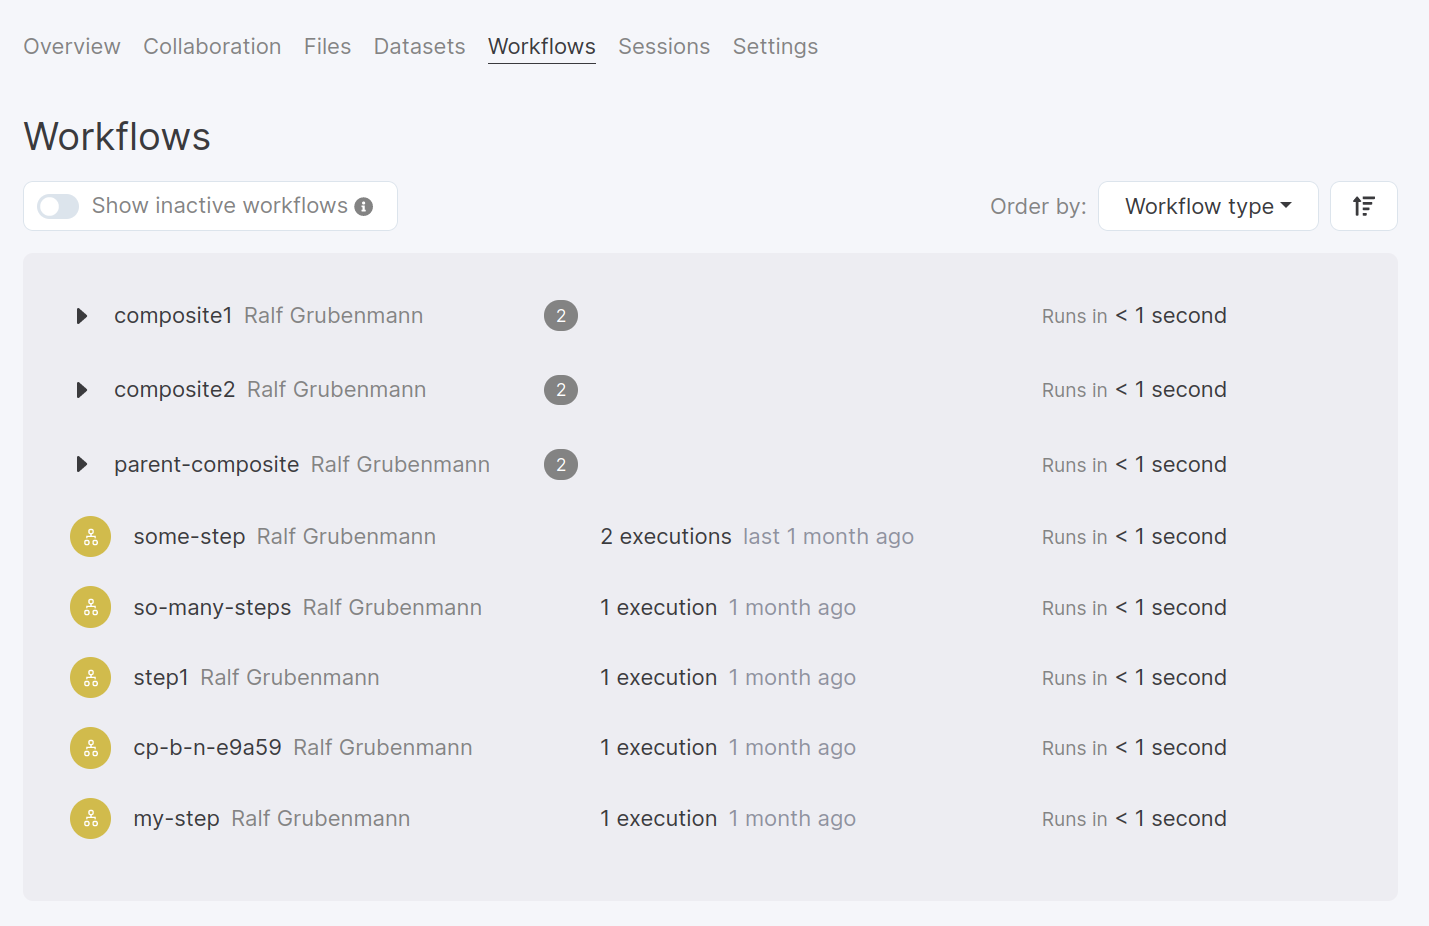
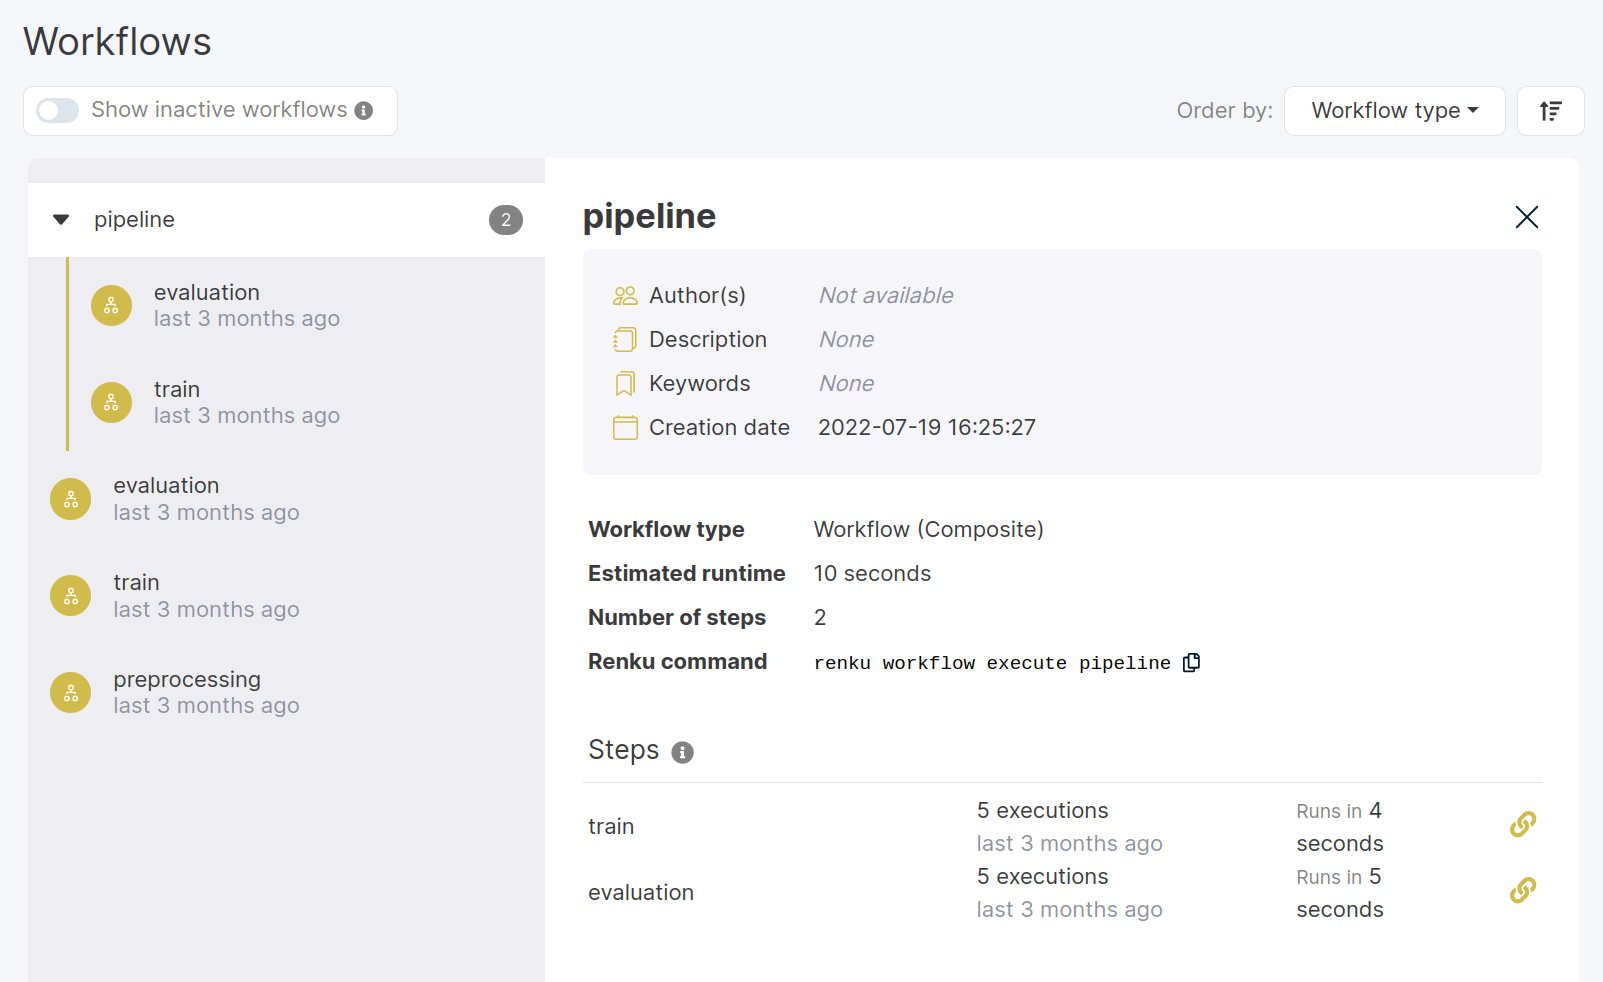
There you can view, filter and navigate all workflows and steps used in the project. Selecting a workflow or step shows you its details (parameters, dependent steps etc.) and allows you to navigate between steps.
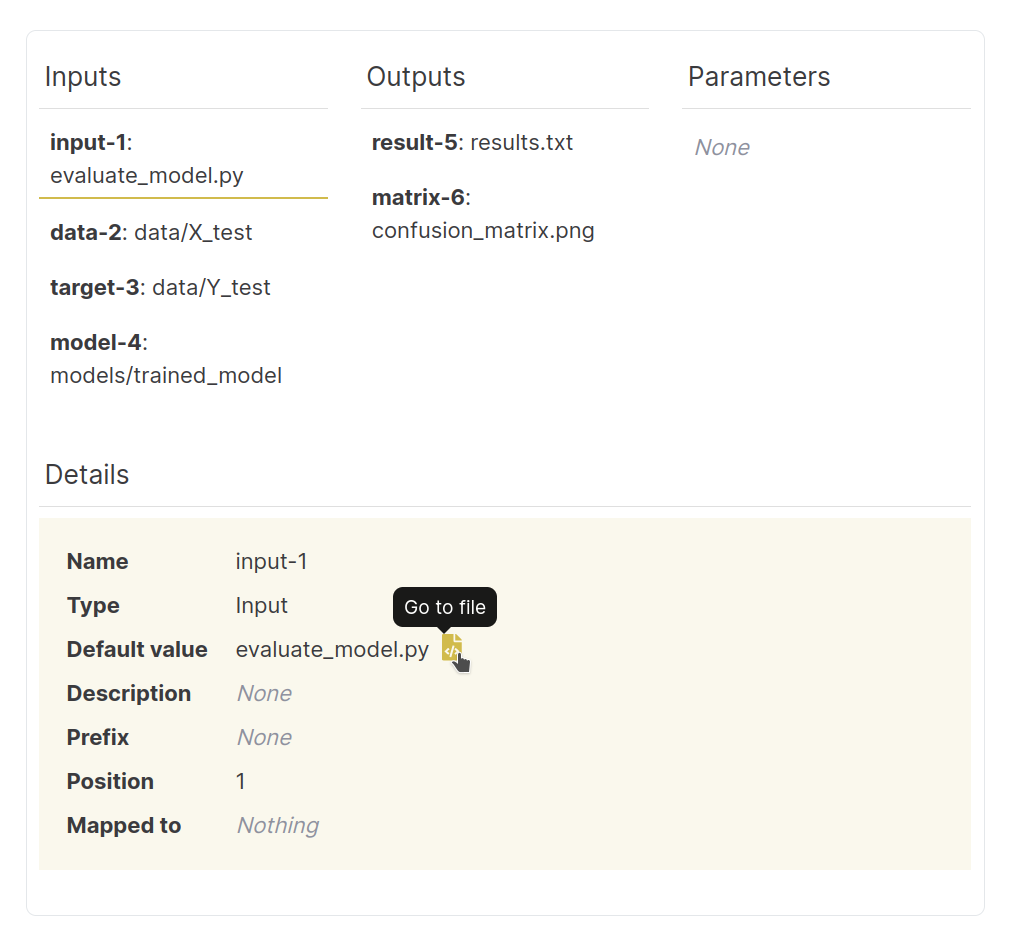
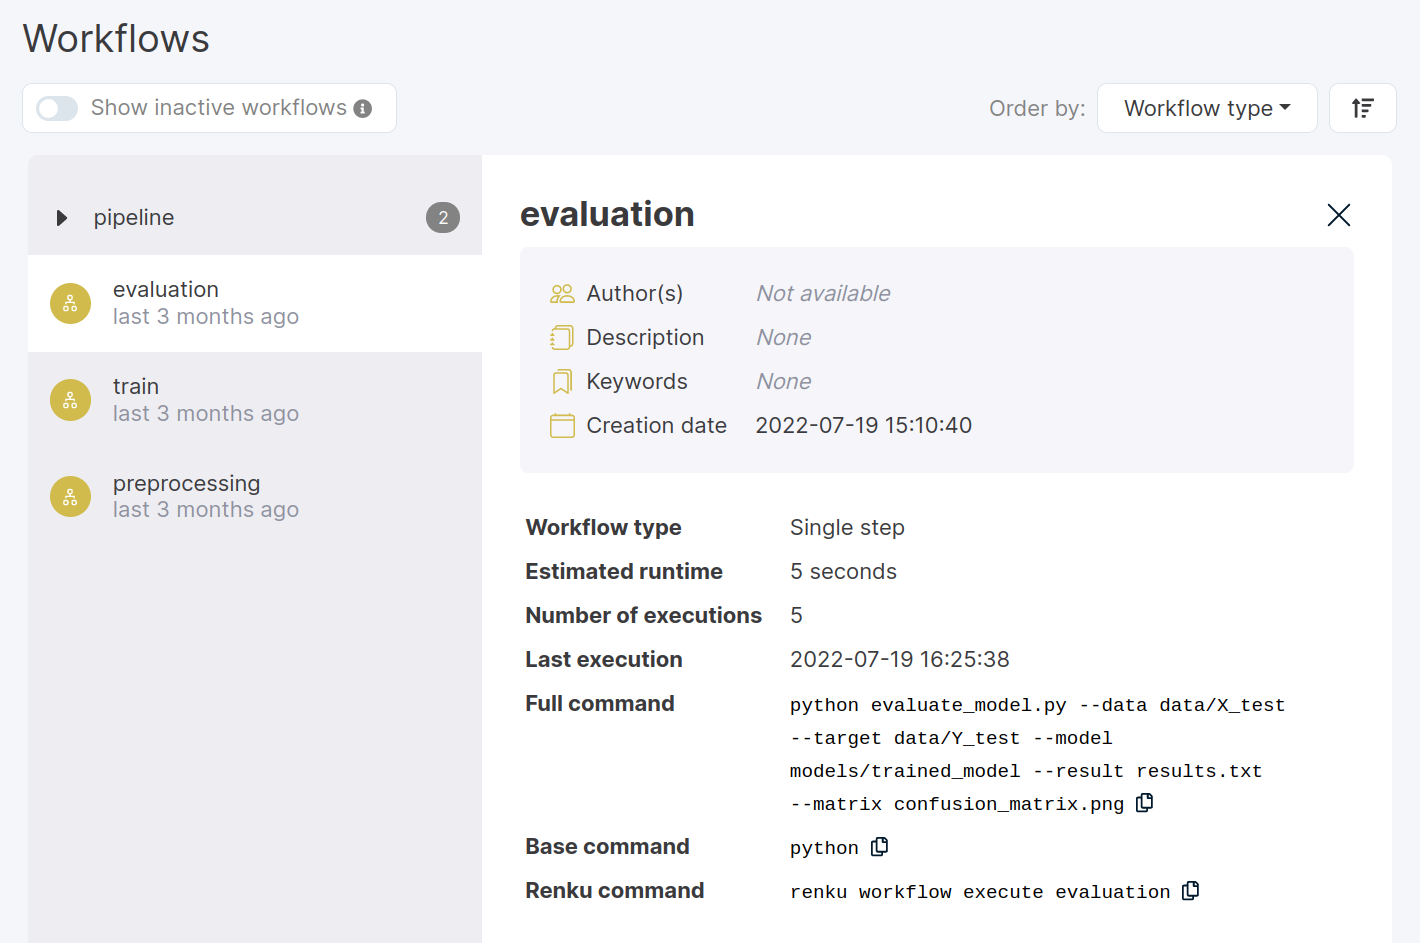
The step detail page shows the command used, the inputs and outputs, the parameters, and other related metadata:
When an input or an output is available in the project’s latest commit, you will notice a link icon that will bring you to the file browser to get a preview or download the content.